Guide
How to add a 3D product configurator to Webflow
Drop an Embed element onto the Webflow page and paste one iframe tag into it, then add your site's domain to the link's allowed domains in the imagine.io dashboard. The configurator loads with its own customisation options and live price, or with the panel hidden and your own buttons driving it. No code export, no custom attributes.
The embed code
One element. The configurator boots, loads its catalog and renders itself, with its customisation options and live price. Replace lk_YOUR_LINK with your sharing link.
<iframe
  id="configurator"
  title="Product configurator"
  src="https://configurator.imagine.io/lk_YOUR_LINK"
  style="width:100%; height:640px; border:0; display:block"
  allow="xr-spatial-tracking; fullscreen; clipboard-write"
  referrerpolicy="strict-origin-when-cross-origin"
loading="lazy"></iframe>Step by step
Create the sharing link and allow your domain
In the imagine.io dashboard open Scenes › Configurable Systems, pick the system, and on its Sharing Links tab create a link. Give it a name for where it will live, choose a theme or leave the default, and under Allowed domains add every domain the page will be served from. Leave the list empty while you test locally, and fill it in before you go live: a link embedded on a domain that is not listed shows a “not authorized” card instead of the configurator.
Copy embed code on the row gives you the iframe below with the link filled in.
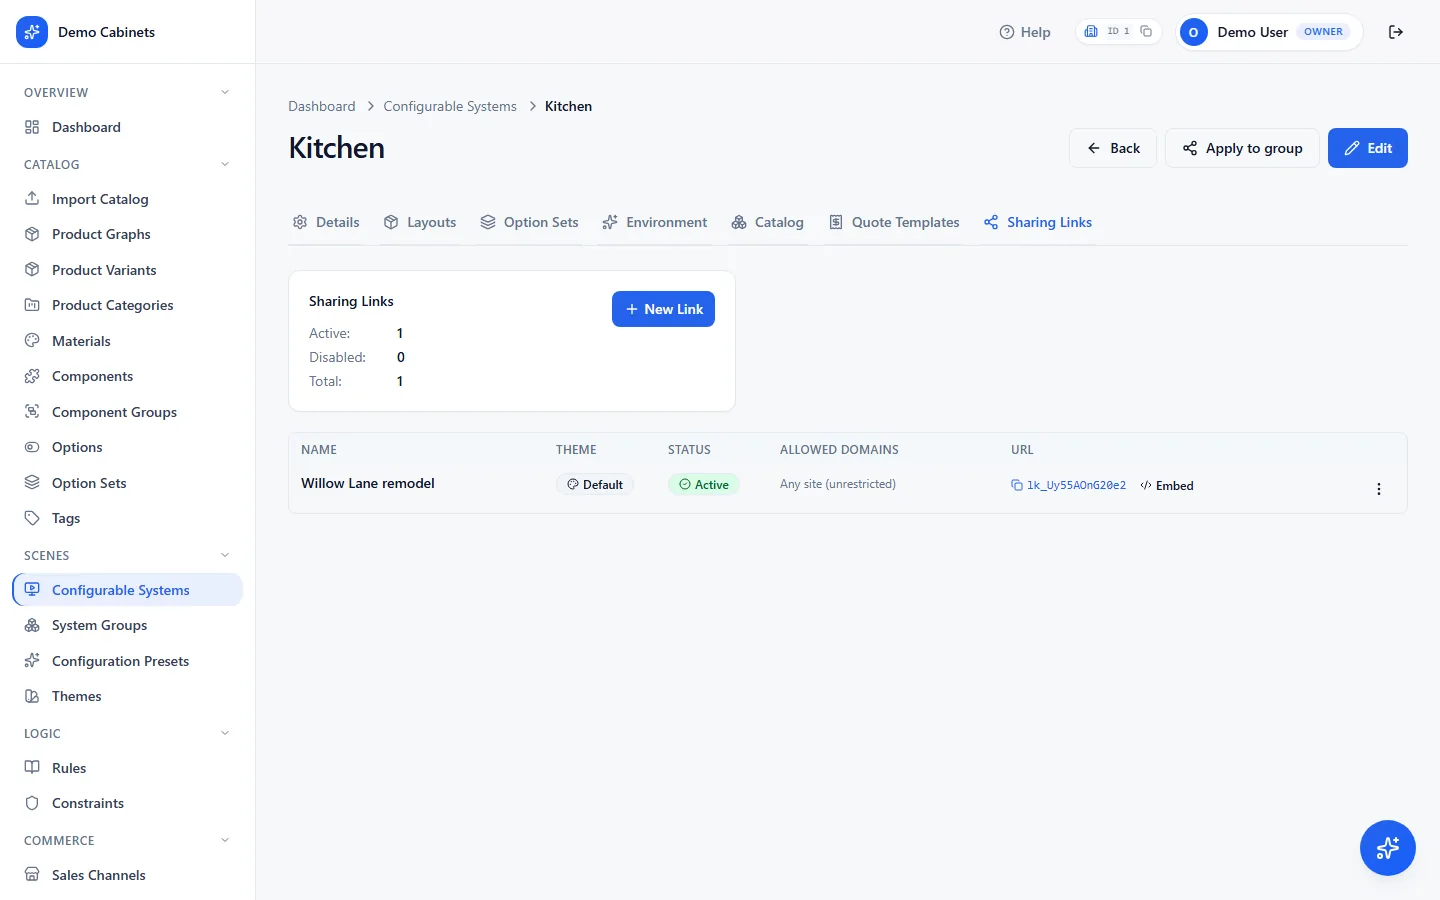
Scenes › Configurable Systems › Sharing Links. One link per place you use it; the allowed domains are set here. Add an Embed element
In the Designer open the Add panel, find Embed under Advanced (or type “embed” in the search), and drag it to where the configurator should sit. Paste the iframe from above with your link in
srcand save.Let it fill its parent
The Embed element sizes itself to the iframe. Give the iframe
width:100%(already in the snippet) and set the height on the iframe or on the parent div,640pxfor a section,80vhfor a full-page experience. Put the Embed inside a Container or Section so it follows your page's width on every breakpoint.One per CMS item
For a configurator per product on a CMS Collection page, add a plain-text field such as
configurator-linkto the collection, put the Embed on the template page, and use the Embed's Add field button to insert that field into thesrc. One template, one iframe, a link per item.Decide who owns the customisation options
Keep the configurator's panel, or hide it with
?hide=sidebaron the link and drive the scene from your own buttons through the postMessage bridge, in the page's Before </body> tag custom code. The 3D view stays.https://configurator.imagine.io/lk_YOUR_LINK?hide=sidebarWith the panel hidden, your page sends the choices in. Wait for the frame to say it is ready, read the option sets to build your own swatches from, then select by name or by id. The ten-line
callConfiguratorhelper is the one from the cart section below.const iframe = document.getElementById('configurator'); window.addEventListener('message', (e) => { if (e.data?.type === 'configurator:ready') start(); // the frame is listening }); async function start() { // Every option set and option, to build your own swatches from const sets = await callConfigurator(iframe, 'getOptionSets'); // Your swatch -> the configurator. By name, or by id when your CMS stores ids await callConfigurator(iframe, 'selectOption', { optionSet: 'Fabric', option: 'Cognac' }); await callConfigurator(iframe, 'selectOption', { optionSetId: 41, optionId: 118 }); // Hide or show parts of the configurator's interface after boot await callConfigurator(iframe, 'hideUI', { regions: ['sidebar'] }); }What you can pass and what comes back: the URL parameters (
hide,gui,theme,project,config), the full protocol, every command with its payload and its real reply (select options, read the quote and the state, camera, interface regions, undo and redo), the events the frame sends out, and the helper. One thing to know: a command the frame accepts can still be refused by a rule a moment later, which arrives as anevaluate.rejectedevent, so roll a cart line back on that event, not on the command's reply.Add every domain you publish to
Webflow publishes to
your-site.webflow.ioand to your custom domain. Add both to the link's allowed domains. The check reads the referrer, so keep the iframe'sreferrerpolicyatstrict-origin-when-cross-originor looser.Publish and test
Embeds render only on the published site, not in the Designer canvas. Publish, open the page on the live domain, change a few options and watch the price.
Hand the configuration to your cart
The bridge gives your page the itemised quote, a thumbnail and a snapshot of the build. Webflow Ecommerce carts do not carry custom line data, so most Webflow sites hand the configuration to a form (a quote request with the snapshot in a hidden field) or to their own checkout or order system. Put the script below in the page's Before </body> tag custom code.
<button id="add-to-cart" disabled>Request a quote</button>
<form id="quote-form" style="display:none"><input type="hidden" name="configuration"><input type="hidden" name="total"></form>// Ten lines you write once: posts a command into the iframe and resolves with its reply.
function callConfigurator(iframe, action, payload) {
return new Promise((resolve, reject) => {
const requestId = 'req-' + Math.random().toString(36).slice(2);
const onReply = (e) => {
const m = e.data;
if (m?.type !== 'configurator:response' || m.requestId !== requestId) return;
window.removeEventListener('message', onReply);
m.success ? resolve(m.data) : reject(new Error(m.error));
};
window.addEventListener('message', onReply);
iframe.contentWindow.postMessage({ action, payload, requestId }, '*');
});
}const iframe = document.getElementById('configurator');
const add = document.getElementById('add-to-cart');
window.addEventListener('message', (e) => {
const m = e.data;
if (m?.type === 'configurator:ready') add.disabled = false;
// The price follows every change the shopper makes. No polling.
if (m?.type === 'configurator:event' && m.event === 'price.changed') {
add.textContent = `Add to cart: ${m.data.currency} ${m.data.grandTotal}`;
}
});
add.onclick = async () => {
const quote = await callConfigurator(iframe, 'getQuote'); // itemised, priced by the engine
const { dataUrl } = await callConfigurator(iframe, 'getScreenshot'); // thumbnail for the cart
const snapshot = await callConfigurator(iframe, 'getConfiguration'); // reopen the exact build later
// Hand it to a Webflow form (a quote request) or to your own backend
const form = document.getElementById('quote-form');
form.elements.configuration.value = JSON.stringify({ quote, snapshot });
form.elements.total.value = `${quote.currency} ${quote.totals.grandTotal}`;
form.requestSubmit();
};If the site sells through a separate checkout (Shopify, Stripe, your own system), post the same payload to that system's endpoint instead; the quote's lines carry every placed product with its chosen options already resolved to names. The bridge chapter documents every field.
Frequently asked questions
Does the Embed element need a paid Webflow plan?
Yes. Webflow's help center says the Code Embed element is available on a site with an active Site plan, or in a Core, Growth, Agency or Freelancer Workspace. On a free Starter site the element cannot be published. See Custom code embed in Webflow's help center.
My site has a Content-Security-Policy. What does it need?
Allow the configurator origin in frame-src, for example frame-src https://configurator.imagine.io. The configurator host permits framing by the domains in the link's allowed domains, so add your site there too.
Can I use my own swatches instead of the configurator's customisation options on Webflow?
Yes. Add ?hide=sidebar to the link so the panel disappears, then call selectOption from your page through the postMessage bridge. getOptionSets returns every option set and option to build your buttons from. The SDK docs cover each command.
Troubleshooting
The Designer canvas shows a placeholder instead of the configurator.
That is normal. Webflow renders Embed elements on the published site only. Publish to the staging domain to see it, and add that domain to the link's allowed domains.
The page shows a “not authorized” card instead of the configurator.
The page's domain is not in the link's Allowed domains. Add it in Scenes › Configurable Systems › Sharing Links, including any preview or staging domain you test on. The check reads the referrer, so the iframe must not set referrerpolicy to no-referrer.
The configurator is blank, or the events arrive but every command times out.
Two usual causes. The page is opened from the file system rather than a web server: a file:// page has no origin the browser will deliver replies to. Or the iframe has a sandbox attribute that strips allow-scripts or allow-same-origin. Remove the sandbox attribute and serve the page over http.
Fullscreen or the Copy button does not work inside the embed.
The iframe needs allow="xr-spatial-tracking; fullscreen; clipboard-write". Without fullscreen the browser blocks the fullscreen toggle. Without clipboard-write in the iframe’s allow attribute, the browser blocks copying inside the configurator.
A licence notice appears on the real site but not in testing.
The free plan is for non-commercial evaluation with the imagine.io watermark. Running on your own domain and storefront is part of a paid plan; the plans are in the dashboard under Settings › Billing.